Showing posts with label coding. Show all posts

Friday, February 7, 2014

Method to get the name of a calling method in C#

When doing quick testing with debug logging it's usually helpful to include the name of the method where a log call originates.  It's pretty easy to include, but it can be a hassle if it's a large method you have to scroll through to find the name, or God forbid if the method name changes in the future.  What would be handy is a quick and easy way to get the name of a calling method at runtime so it's guaranteed to be the correct name.

This is one thing I've wanted for quite some time, and for one reason or another I never spent the time to investigate how to access this until now.  It was surprisingly easy to setup and works very nicely by taking advantage of the System.Diagnostics.StackFrame class to determine the calling method.

Here's what I came up with.  You're welcome to copy and use this code in your own projects.

1:  // Use a stack frame to get the name of the method which called this method   
2:  public static string GetCallingMethodName ( bool includeClassName = true )  
3:  {  
4:      System.Diagnostics.StackFrame lastFrame = new System.Diagnostics.StackFrame(1);  
5:    
6:      // return ClassName.MethodName  
7:      if ( includeClassName == true )  
8:          return lastFrame.GetMethod().DeclaringType.Name + "." + lastFrame.GetMethod().Name;  
9:    
10:      // return just MethodName  
11:      return lastFrame.GetMethod().Name;  
12:  }  

I'm not sure what the performance penalty is for using this at a high frequency, so if anyone has insight into that I would love to hear it!

Wednesday, December 4, 2013

Busy year doing contracting work and using OpenCV

So 2013 has been a pretty busy year.  Contracting has been going incredibly well and I've had a chance to work on some really cool stuff.  Jumping back into C++ after 2 years away from it was quite fun, although it reminded me how tedious and annoying C++ can be, especially when trying to do small things.  Unfortunately being so busy also meant I neglected this blog for most of the year.

My most recent contracting project is pretty interesting and gave me a chance to learn some new things.  One of my more recent tasks was creating a high-speed image processing tool, which lead me to learn about using the OpenCV library for image processing tasks.  There are some pros and cons to using it, however the pros definitely outweigh the downsides.  OpenCV has a huge amount of functionality built-in for image processing, and the API to use it is quite easy to use.  One of the simplest, yet most powerful, methods I found in the library was imread() which handles reading an image file and loading the pixel data into an object.

There are some gotchas when using OpenCV, one that tripped me up initially was how it stores pixel data.  All game engines I've worked with handle color data as RGB channels, OpenCV uses BGR channels (the Red and Blue channels are switched).  This ended up biting me for a little while during the first round of testing when the tool flagged red images as blue ones.

I should also mention OpenCV assumes you have some level of knowledge of image processing techniques, and is mainly there to provide implementations of those techniques.  Coming into it with little knowledge of the subject like I did will be difficult, expect to do a lot of research to play catch-up for what they talk about.

On a final note, if you're new to OpenCV, I highly recommend checking out these excellent lessons http://opencv-srf.blogspot.com/p/opencv-c-tutorials.html. They provide a great starting point for navigating the OpenCV library and some terrific examples of image filtering operations.

Wednesday, October 10, 2012

Trick for visualizing arrays of serializable classes in the Unity3d inspector

In the Unity3D editor,the inspector will automatically show the names and values of any variables you declare within a MonoBehaviour -derived component. This is incredibly useful for debugging the values of properties while testing, and also provides a very easy avenue to tweaking the values of exposed variables.

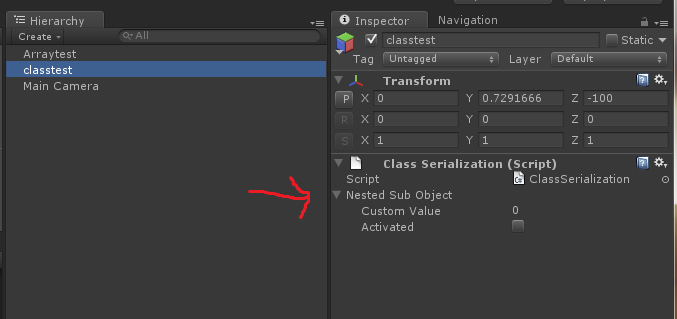
However what do you do if you want to nest a class of related properties in a MonoBehaviour -derived component?  By default the names and values of the variables within the nested object will appear in the inspector.  This is where the System.Serializable attribute is necessary, applying the System.Serializable attribute to the class will tell the Unity inspector to display the names and values of the variables in the inspector.  This makes the System.Serializable attribute a very handy tool!


One common using for serializable nested subclasses is in lists/arrays to hold configuration data for any number of things, such as inventory descriptions and properties, level lists, difficulty modifiers, etc.  Unfortunately when you put a serializable class in a List or Array, the way each instance element is named leaves a lot to be desired for the person editing the data.  Each element is named "Element ", which doesn't give any high-level information regarding what data each element contains.  In order to find the element with the data you wish to modify, you'll need to expand each element and look at the properties until you find the one you're looking for.

This shows an Array and  List of the same serializable class.   Each element is named "element ", which doesn't give any high-level information regarding what each element contains.

But wait!  There's an undocumented (as far as I know) trick to drastically improve this!

When you declare a public string as the first variable in a serializable class, the inspector will use the value of that string in lieu of the "Element " tag for each instance data element!


This shows the Arrays and Lists of the same serializable class.  Which do you think it easier to work with?

This makes data management much easier by providing a high-level view of the information each element contains.  Additionally whoever is editing the data can change the value of the string description to suit their tastes.

Expanded view of the List container to show the inner properties of each element. Notice the "String For Description" string is the first element in the class, and the value is used to name each list element.

Hope you find this information useful, leave a comment if you know of any other little Unity tricks, I'm always on the lookout for more!

Friday, October 5, 2012

Making use of C# extension methods in Unity3d

I recently started using C# extension methods in Unity3d and found them very helpful for my workflow, so I decided to share.  During development of my recently released game Match'n Flip my goal was to rapidly prototype new game play modes quickly, so being interrupted by small things was very disruptive.  So far I've only done very simple helper methods, but these handle things which previously broke my workflow because of small nuances.

One particularly useful extension set I created are methods to move a game object along one axis, such as move a game object along the global x axis by 5 units.  Conceptually this is a very simple operation:

transform.position.x += 5F;

is essentially all you need to do, however because Unity doesn't allow you to change just 1 element of the position Vector3, instead you need to do this:

Vector3 temp = transform.position;
temp.x += 5F;
transform.position = temp;

Conceptually not difficult, but writing those 3 lines can easily break your train of thought as you're working and slow down your creative process. Additionally these little snippets are annoying because you actually have to look at them a moment to see what the transform operation is, since the meat of the operation is done on a new object not related to the object you want to modify (temp Vector3 local variable vs the position vector3 transform property).

To reduce these brain train killer situations, I created a set of ShiftPosition transform extensions methods to handle the annoying part of these operations.  Using these I can do the same operation as above one neat line and in a way that's intuitive to see what's going on:

transform.ShiftPositionX(5F);

Under the hood the ShiftPositionX/Y/Z extensions are still modifying a temp Vector3 which is re-assigned back to the transform.position property.

Here's a small snippet of what the TransformExtensions class looks like, sorry for formatting getting hosed.  Feel free to use this in your own projects if you wish, or if this is interesting to anyone, please contact me and I'll expand on this with more helpers/details!

public static class TransformExtensions
{

#region ShiftPosition

public static void ShiftPositionX ( this Transform tran, float offsetX )
{
Vector3 temp = tran.position;
temp.x += offsetX;
tran.position = temp;
}

public static void ShiftPositionY ( this Transform tran, float offsetY )
{
Vector3 temp = tran.position;
temp.y += offsetY;
tran.position = temp;
}

public static void ShiftPositionZ ( this Transform tran, float offsetZ )
{
Vector3 temp = tran.position;
temp.z += offsetZ;
tran.position = temp;
}

#endregion ShiftPosition

}

Hope you find these useful!

Monday, May 21, 2012

Fixing Long Load Times in Shatter Crash

Development on Shatter Crash is moving along pretty well, we are currently working on polishing, UI and bug fixing.  One of the things I decided to tackle today was the long load times we were seeing when traveling from our game play scene back to the main menu scene.  This was especially bad on the iPad's, where we could see load times between 10 and 15 seconds.

The first thing I did was use Unity's cool profiler tool to get a sense of where time was being spent by running the game on my computer. However this ended up failing horribly because the editor continually stalled or crashed while I did deep profiling, probably because the call trees were incredibly deep.  Doing regular, non-deep profiling, didn't flag anything that jumped out as problematic, so I began to suspect the issue had to do with asset loading. As a note, as far as I know Unity's profiler doesn't give much details about asset loading/unloading, so this was simply a theory. (As a note, I didn't have wifi access at the time, so was unable to directly profile the game running on the device.)

I began to suspect the extended load times had to do with our GUI solution forcing Unity to pull in a lot of textures and create a number of object hierarchies.  I tested this by creating an iPad build with most of the UI ripped out to see how much faster the main menu loaded.  To my surprise, it only dropped the load time from ~15 seconds to ~14 seconds...looks like the GUI isn't to blame. I eventually resorted to brute force debugging by removing objects from the scene and pushing a new build to the device to see if things got better.  This certainly wasn't an ideal debug flow, but it did work.

I eventually found the cause of the load time spikes was related to how we referenced the puzzle data for Shatter Crash's game levels.  Our puzzle data is stored in ScriptableObjects for convenience, and each 'level' contains lists with hundreds, or thousands, of entries which define each piece on a puzzle board. For simplicity, I had created a script and prefab which directly referenced each of these puzzle ScriptableObjects (about 30), and this prefab was referenced in the main menu.  Removing the reference to this puzzle container prefab dropped our load times from ~15 to ~3 seconds...sweet problem found!  It seems Unity was taking a long time to load the main menu because it was loading and parsing all the list data in each of the puzzle data files.

Now that I knew the cause of the problem, the fix was fairly straightforward, although a bit tedious.  I changed the puzzle loading system to use Resources.Load to dynamically load the puzzle data we needed on-demand.  I generally shy away from using the Resources.Load() much because it's a real pain in the butt to keep asset paths up-to-date, and when I do I generally write unit tests to validate the existing paths are good.  While I was copy pasting strings, I came up with an idea for a new tool to automatically create Resource paths, hopefully I'll have a chance to create it in the near future

*UPDATE* - The game described here was ultimately released as 'Shatter Crash'.  I edited several places where I referenced it by its old name 'Access Point' to refer to the new name

Friday, April 20, 2012

System.Serializable attribute annoyances in Unity3D


I recently discovered the [System.Serializable] attribute introduces an unfortunate quirk when used in Unity3d, which is very annoying to get around.  When you mark a class as Serializable, Unity will automatically instantiate an object for any field you define of that class type.  Even if you want that field to be null.  Take the following code:

[System.Serializable]
public class SerializableDataClass
{
    public int SomeValue = -1;
}

public class NormalDataClass
{
    public int SomeOtherValue = -1;
}

public class MyMonoBehaviour : MonoBehaviour
{
    // Will Never Be Null, not expected
    public SerializableDataClass DataObj1 = null;

    // Will Remain Null Until Assigned, as expected
    public NormalDataClass DataObj2 = null
}

Logically, you'd expect MyMonoBehaviour's DataObj1 and DataObj2 fields to initialize to null and remain null until assigned an object to reference.  Unfortunately this isn't the case, DataObj1 will automatically have an object created and assigned to it, even if you initialize it to null and try setting it to null in other areas like Awake()/Start()/Update().  This behavior becomes very disruptive if you have logic that triggers based on if DataObj1 != null.

Tuesday, December 20, 2011

Unity3D EditorWindow Formatting Tip

During the past several months I've done a bit of work extending the Unity3D editor to create custom editor functionality for my upcoming game.  Unity makes it ridiculously easy to implement custom functionality in the editor, however their documentation can leave something to be desired.  One of the hidden nuggets I found is EditorGUIUtility.LookLikeControls() , which exposes custom formatting for certain EditorGUILayout elements.


Here's an example of using EditorGUILayout.EnumPopup() and EditorGUILayout.LabelField() to show some enum and string values.  As you can see the description label on the left is cut off, which makes this GUI very unusable.  EditorGUIUtility.LookLikeControls() lets you change the default pixel size of one or both of the content display fields for these methods, so you can make your GUI's much more readable.


Here's the same menu using EditorGUIUtility.LookLikeControls(250), which expands the first content zone to 250 pixels, and provides a nice amount of space to clearly mark the inputs for the menu.  And as you can see at the bottom, calling EditorGUIUtility.LookLikeControls() with no params will restore the GUI system to the default layout for these elements.

Saturday, September 24, 2011

Handling Texture Tiling and Offset in a Unity3d Vertex and Fragment Shader using TRANSFORM_TEX macro

When doing some test work, I found my Cg shader wasn't handling texture offset and tiling properly, resulting in distortion such as below:

The Unity shader on the left properly handles a 3x tiling factor for the texture, while my shader on the right doesn't properly handle the same 3x tiling factor


My shader setup was pretty simple, here's a snippet of the important parts:

#include "UnityCG.cginc"

sampler2D _MainTex;
float4 _Color;

v2f vert ( appdata_base v )
{
    v2f o; 

    o.pos = mul (UNITY_MATRIX_MVP, v.vertex);

    // Texture offset - BAD
    o.uv = v.texcoord;
    return o;
}

half4 frag (v2f i) : COLOR
{    
    return tex2D(_MainTex, i.uv) * _Color;
}

I bolded the problematic part, which is the Texture UV handling in the 'vert' program.  Simply grabbing the v.texcoord will work when there is not tiling or offsets in the texture, but breaks once those elements are introduced

After snooping around, I found the solution is to use the TRANSFORM_TEX macro in the UnityCG.cginc to make sure the texture's offset and tiling are properly applied.  A small caveat to this is you must, "declare float4 properties for each texture before the vertex program, with _ST appended" (Quoted from Unity3d shader docs).

Here's a snippet of my shader with the new changes:

#include "UnityCG.cginc"

sampler2D _MainTex;
float4 _Color;
uniform float4 _MainTex_ST; // Needed for TRANSFORM_TEX(v.texcoord, _MainTex)

v2f vert ( appdata_base v )
{
    v2f o; 

    o.pos = mul (UNITY_MATRIX_MVP, v.vertex);

    // Texture offset - GOOD
    o.uv = TRANSFORM_TEX(v.texcoord, _MainTex);
    return o;
}

half4 frag (v2f i) : COLOR
{    
    return tex2D(_MainTex, i.uv) * _Color;
}

With this happy little change, our shader now properly handles the tiling and offsets of the texture.
 

For those curious, I gleaned this information from the Unity3D Vertex and Fragment Programs and the ancient Unity 2.x Shader Conversion Guide.  The info pulled from the Shader conversion guide regards the _MainTex_ST property needed for TRANSFORM_TEX to work. 

UPDATE - Dec 1, 2013 - The Unity 2.x Shader Conversion Guide seems to have disappeared from the internet.  This information is all still relevant for Unity 4.x release versions